
| Features > User Objects > Add a User Object |
To add a user object, you should do the following steps:

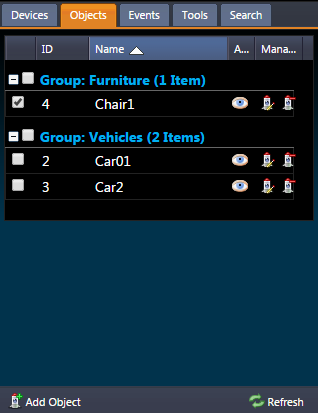
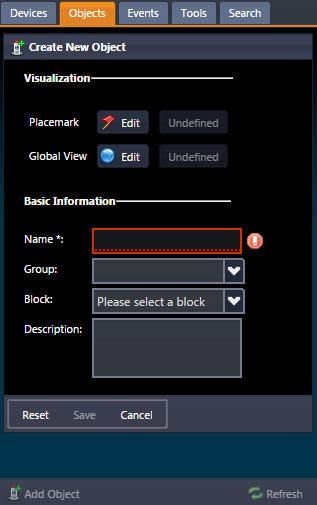
To start to add a user object, you need first click the  button (the left part of the above illustration) to bring out the page (the right part of the above illustration) for guiding you to add the user object, as illustrated below. As you see, the placemark, global view and basic information should be respectively defined to add the user object.

You need to click the  button to define the placemark and click the
  button to define the global view for the adding user object.

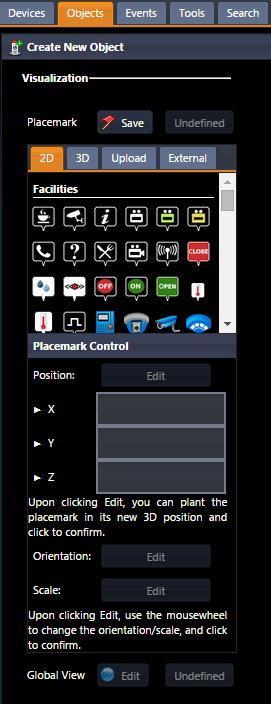
NUCLEUS provides a library of built-in 2D icon or 3D model placemarks for you to choose, and you can do it by:
 button to save.
 In addition to the built-in placemarks, you are allowed to use your customized placemarks as well. Specifically,
For the user object, which is now placed in the 3D view, you can relocate as well as edit its orientation and scale:
 button in the Global View field (it will change to
  after the clicking);
 button to save the global view for the user object.
 |
If the user object has already defined its global view, the above steps will override the original global view, and this overriding cannot roll back. |

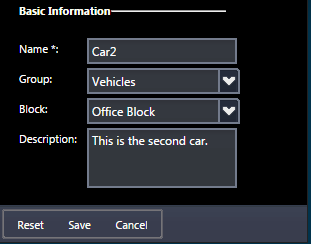
In the basic information section, the following information is required:
If you have input the necessary particulars to define the user object, you can click the "Save" to finish the adding. Otherwise, you can click the "Reset" to clear off your input, or click the "Cancel" to terminate the process of adding the user object without any saving.
 |
If your NUCLEUS license does not have the entitlement to add an additional user object, you will encounter a failure when you save. Thus, we suggest you checking the license before starting to plant in a user object. |